A while back, I was trying to improve my Instagram photos without spending hours learning complicated editing software. I downloaded a few popular apps, but most of them either felt confusing or required a paid subscription for basic features.
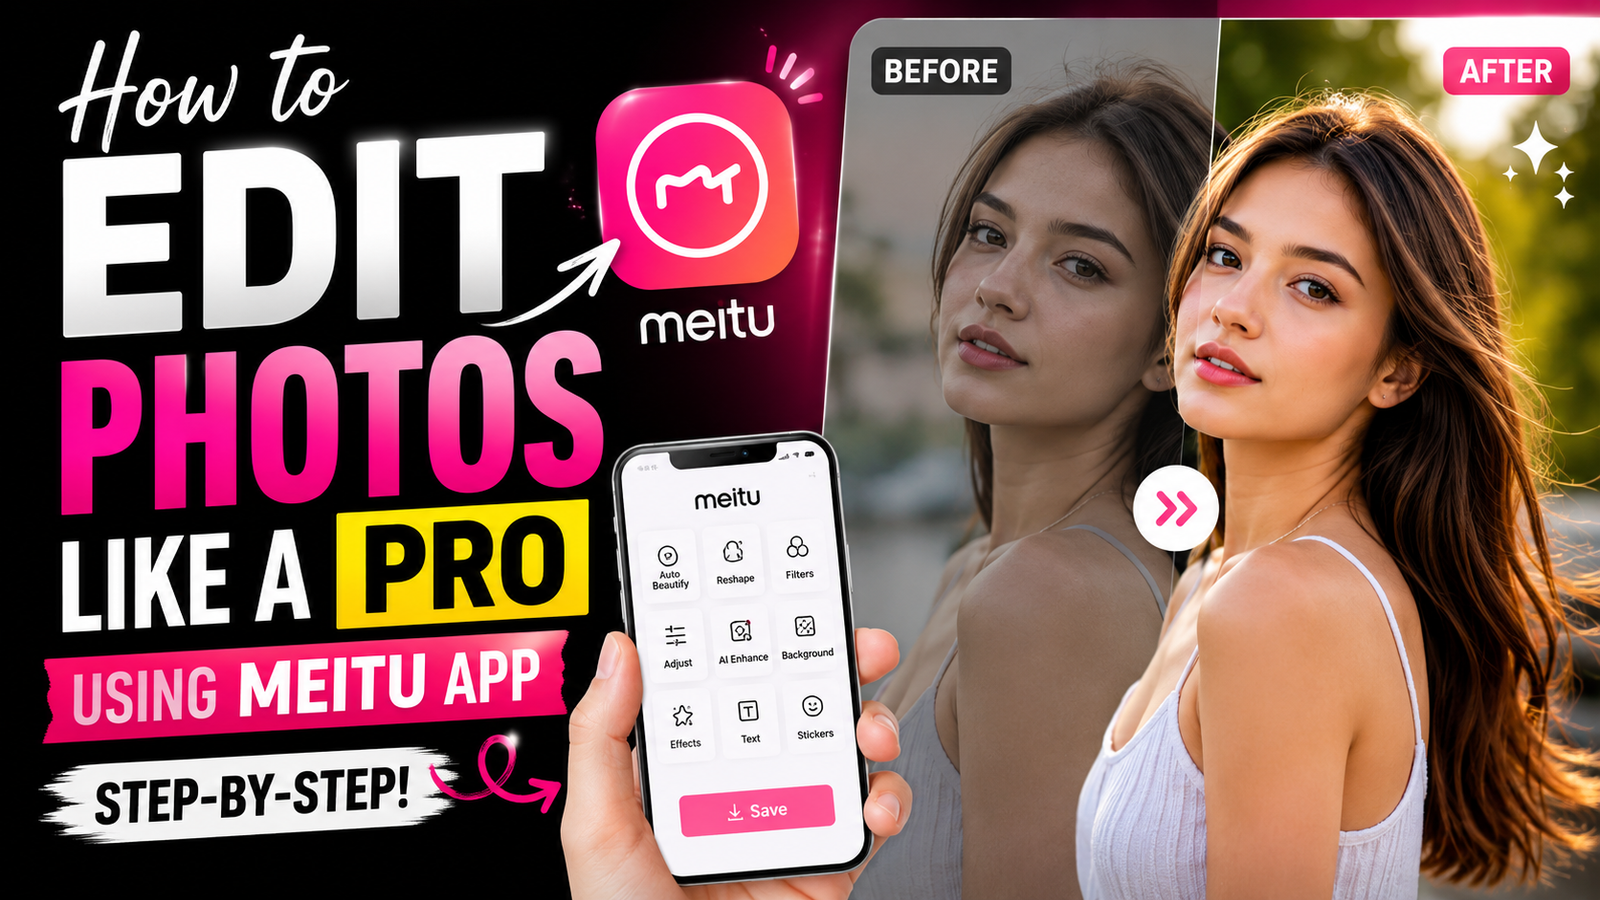
Then I tried Meitu.
Honestly, I wasn’t expecting much. At first, I thought it was just another beauty camera app. But after spending a few days testing different tools, I realized it could do much more than that.
I have seen that many beginners skip Meitu because they think it is only for selfies. That’s not true. You can use it for portraits, travel photos, social media posts, and even product photography.
If you want your photos to look cleaner and more professional, here’s the process I usually follow.
Why Meitu Is Popular
One reason people love Meitu is that it keeps things simple.
You don’t need professional editing skills. Most tools are clearly labeled, and the app helps you achieve good results quickly.
Some useful features include:
- AI Photo Enhancement
- Beauty Retouch Tools
- Filters
- Background Blur
- Color Adjustment
- Object Removal
- Skin Smoothing
Many people try this but end up using too many effects. The secret is actually doing less.
Step 1: Import Your Photo

Open Meitu and tap Edit Photo.
Choose a photo from your gallery.
Before editing, look at the image carefully.
Ask yourself:
- Is it too dark?
- Are the colors dull?
- Is the background distracting?
Finding the problem first makes editing much easier.
Step 2: Fix Brightness and Contrast
This is usually the first adjustment I make.
Go to the Adjust section and slowly increase brightness if the photo looks dark.
Then add a little contrast.
The goal is to make the subject stand out without making the photo look artificial.
One mistake I made when starting out was increasing brightness too much. Everything looked washed out and unnatural.
Small changes often give better results.
Step 3: Improve the Colors
Now move to the color settings.
Adjust:
- Saturation
- Vibrance
- Temperature
If your photo looks dull, a small increase in vibrance can make colors pop.
Be careful with saturation.
Too much saturation can make skin tones look strange.
I have seen that photos with natural colors usually get better engagement on social media than heavily edited images.
Step 4: Use AI Enhancement
Meitu includes an AI enhancement tool that can improve photos with one tap.
Sometimes the results are surprisingly good.
Sometimes it doesn’t work perfectly, and that’s okay.
AI tools are helpful, but they aren’t magic. Always compare the original photo with the edited version before saving.
If the photo starts looking fake, reduce the effect.
Step 5: Retouch the Face Carefully
This is where many people go wrong.
Meitu offers tools like:
- Skin Smoothing
- Acne Removal
- Teeth Whitening
- Face Reshape
These tools can improve a portrait, but they should be used gently.
I personally keep skin smoothing low.
Natural skin texture is normal.
When people remove every tiny detail from their face, the photo starts looking unrealistic.
A little retouching is usually enough.
Step 6: Apply a Filter

Filters can completely change the mood of a photo.
Meitu offers many filter categories such as:
- Natural
- Fresh
- Vintage
- Film
- Portrait
Here’s a simple trick.
Instead of using a filter at 100%, reduce it to around 40–60%.
This keeps the effect subtle and professional.
Many creators use this method because it makes photos look polished without appearing over-edited.
Step 7: Blur the Background
If the background looks messy, use the blur tool.
This feature helps draw attention to the subject.
I often use it for outdoor photos where there are too many distractions in the background.
A soft blur usually looks better than a strong blur.
Too much blur can make the photo look edited immediately.
Step 8: Add Sharpness

After finishing the main edits, add a little sharpness.
Sharpness helps details stand out.
Be careful though.
Excessive sharpening can make the image look noisy.
A small adjustment is all you need.
Step 9: Save in High Quality
This step is surprisingly important.
Many people spend ten minutes editing and then save the image using low-quality settings.
Always export your photo in the highest available quality.
This helps preserve details when uploading to Instagram, Facebook, or other platforms.
My Simple Meitu Editing Formula
For most photos, I follow this order:
- Brightness
- Contrast
- Color Adjustment
- AI Enhancement
- Face Retouching
- Filters
- Background Blur
- Sharpness
- Export
This workflow keeps everything organized and prevents over-editing.
Common Mistakes to Avoid
Using Too Many Filters
One good filter is usually enough.
Stacking multiple effects often ruins the image.
Over-Smoothing Skin
Natural skin looks better than plastic-looking skin.
Ignoring Lighting
Editing helps, but good lighting is still the biggest factor in photo quality.
Copying Other People’s Settings
Every photo is different.
A setting that works perfectly for one image may look terrible on another.
Is Meitu Worth Using?
After using Meitu for quite some time, I can say it’s one of the easiest photo editing apps for beginners.
You don’t need expensive software or advanced editing skills.
The app gives you enough tools to improve photos quickly while keeping the editing process simple.
If you’re creating content for Instagram, Facebook, TikTok, or even personal use, Meitu is a great place to start.
Just remember that good editing isn’t about changing everything. It’s about improving what is already there.
FAQs
1. Is Meitu App free to use?
Yes, Meitu offers many free editing tools. Some advanced features are available through a premium subscription.
2. Can beginners edit professional-looking photos with Meitu?
Yes. The app is beginner-friendly and includes simple tools that can produce professional-looking results with minimal effort.
3. Which Meitu feature is best for portrait editing?
The Beauty Retouch and AI Enhancement features are among the most popular tools for portrait editing because they help improve skin, lighting, and overall image quality.